Toby’s Terezin Legacy Nut Braid Recipe + 589 Cookbook Collection
163 Jewish cookbooks and counting!
Today I am sharing an old recipe adapted by Toby Colton, a passionate cook with an impressive cookbook collection and a very special recipe to share: a nut braid recipe smuggled out of Terezin, a town in the Czech Republic that is also known by the German name Theresienstadt, that was used as a Jewish ghetto and concentration camp during the Shoah.
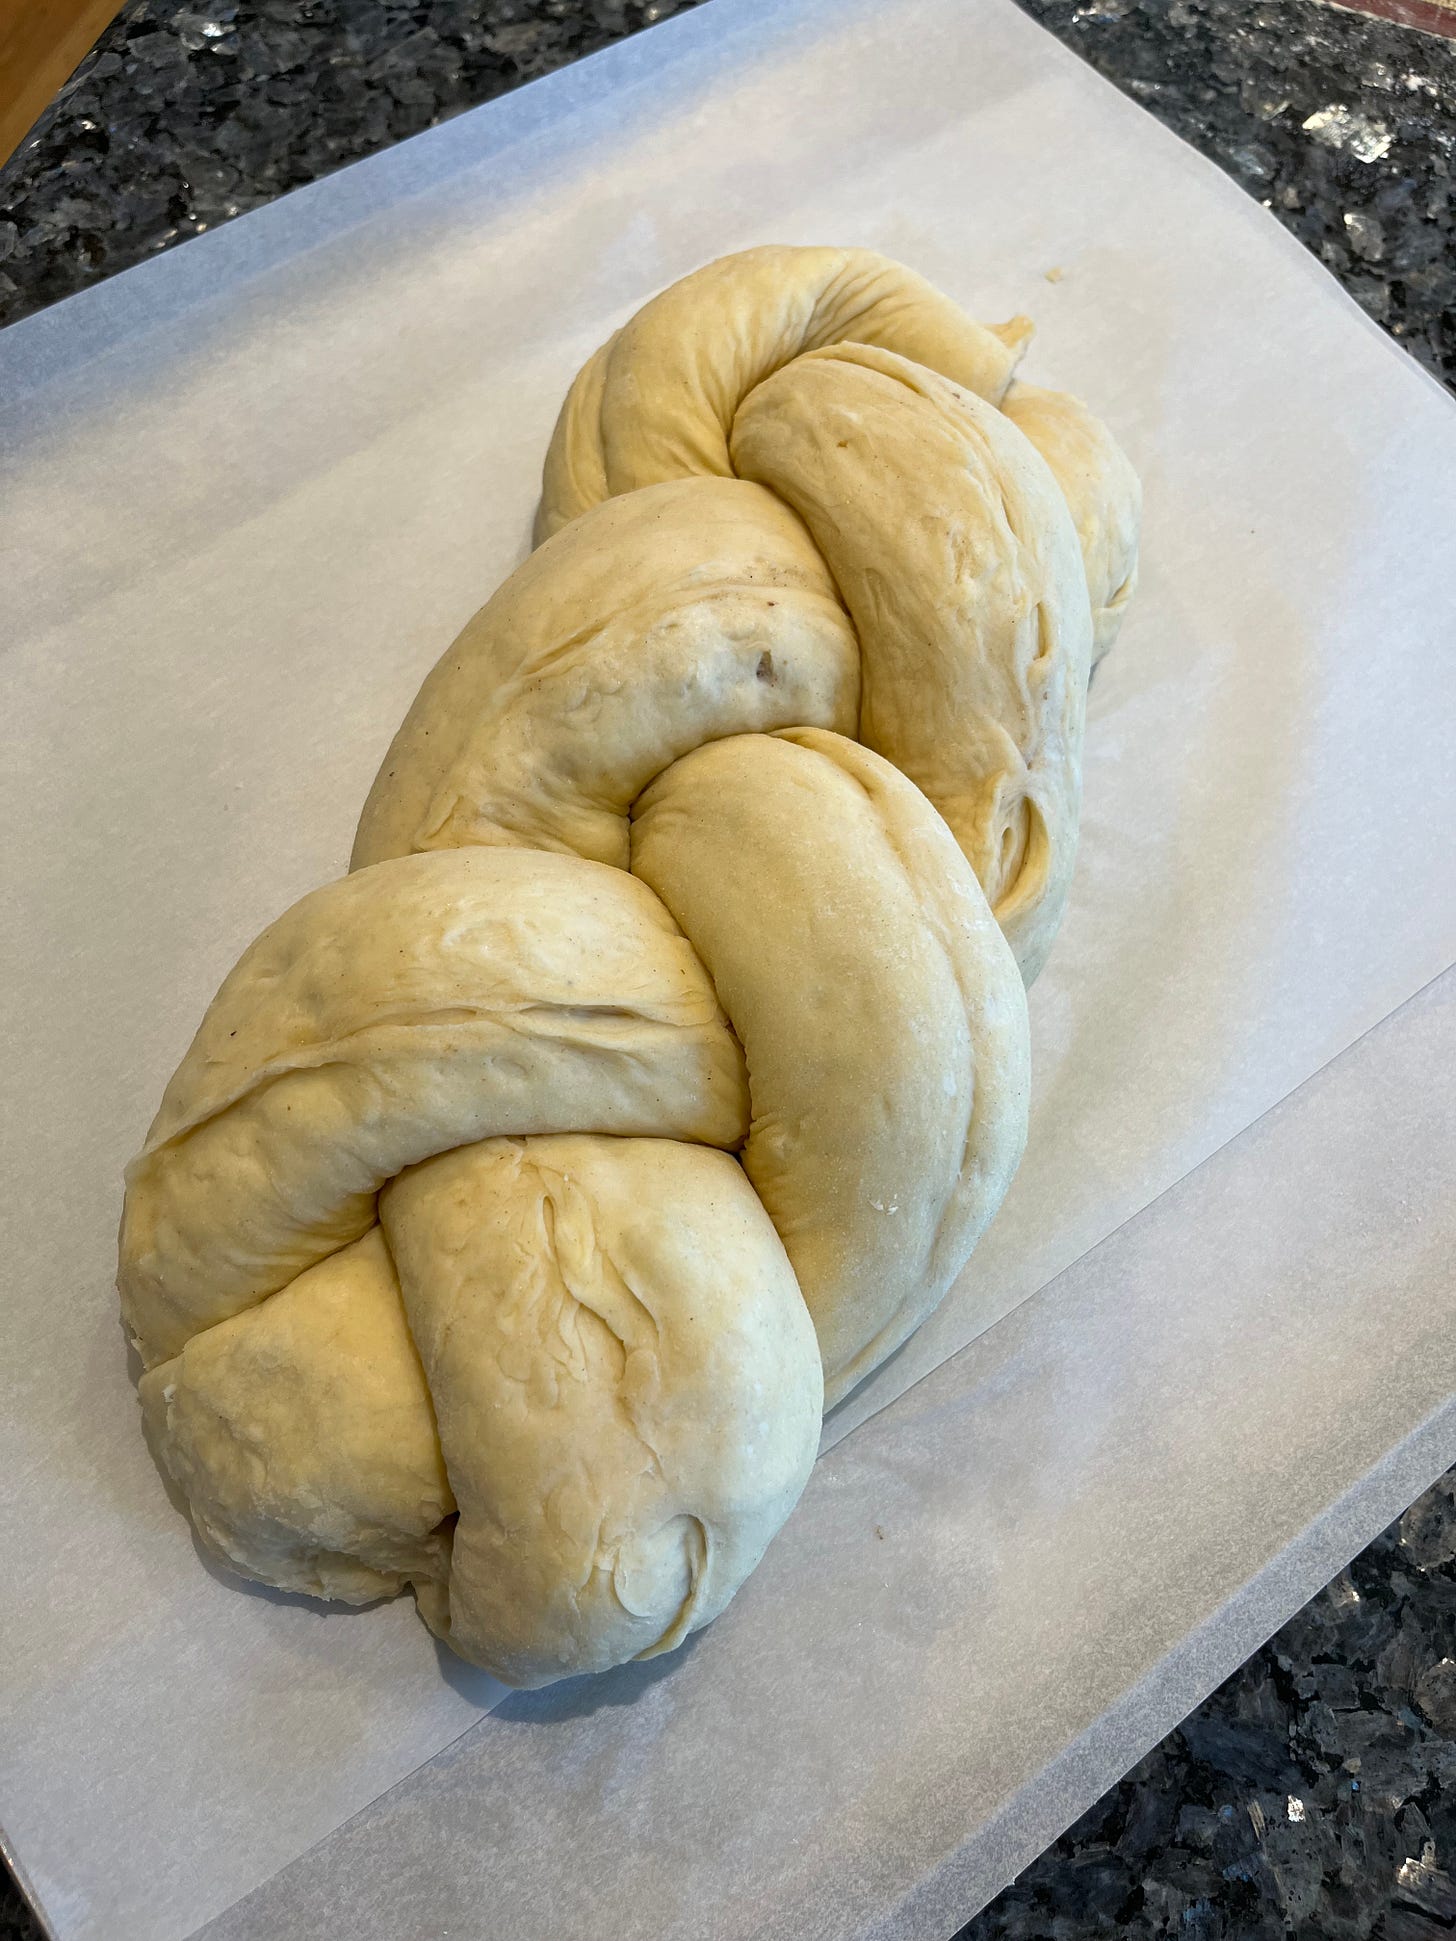
Toby’s mother and grandmothers were not huge cooks, so she has worked to build her own Jewish food repertoire, and her cookery book collection has been key to how she has done this. Today she shares her recipe for Terezin Legacy Nut Braid, a delicious rich flaky pastry loaf filled with nuts and dried fruits.
Toby developed this recipe from an incomplete one she discovered in a book of recipes smuggled out of Terezin (also known as Theresienstadt) - recipes that had been written by women who were separated from their families and slowly being starved. I was moved by Toby’s emotional connection to the recipe and its original maker, and her conviction that making this recipe is a way of making sure this woman would not be forgotten.
Toby, could you please introduce yourself to our readers, share a bit about your background and tell us what led you to develop such a deep passion for food, cooking and baking over the years?
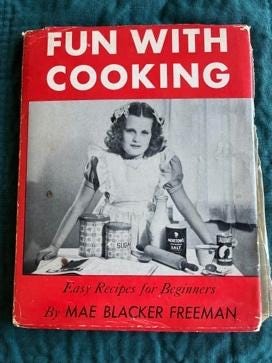
My name is Toby Colton and I am nearing the age of 77. I’ve been interested in cooking, baking and food culture from a young age, ever since my aunt gave me my first cookbook- a children’s cookbook - when I was six. She had me put a folded piece of wax paper into the book to protect the pages when cooking. I still have that waxed paper today! I think I was hooked from then on.
When I was in high school, I got home sooner than my mother did each day. I asked her to tell me what she wanted me to make, and I would get dinner started so that we could eat sooner. Looking back, that must have been an amazing gift for a teenager to give to her mother. My mother was a home economics teacher and she was aware of what it meant to eat healthy meals at that time.
Tell us about your cookbook collection: What sparked your interest in collecting cookbooks, and do you have any favorites that you return to time and time again?
My cookbook collection consists of 589 titles, comprising 163 Jewish cookbooks, 84 dessert cookbooks, and 342 general culinary cookbooks.
I have always had an interest in Jewish food. My mother was a good cook but did not have a big repertoire of Jewish dishes; she made some dishes - things like matzah balls, matzah brie, kreplach, latkes, cheese blintzes, brisket, and honey cake. Neither of my grandmothers were good cooks so, sadly, recipes were not passed down. So, I needed to build my own repertoire of Jewish cooking, and I began accumulating Jewish cookbooks to learn.
Most of the early books that I acquired were Ashkenazi and/or kosher. Once I discovered books from other parts of the Jewish world, I became fascinated. How was charoset different in Italy, Syria, France, Greece, India, Yemen, Libya, and Kurdistan? I sought out and purchased a used copy of Maida Heatter’s Book of Great Cookies first published in 1977. On page 201 she introduced the country to rugelach and its cream cheese dough. Rugelach, a quintessential Jewish cookie, is now made in restaurants and homes throughout the country. Since I did not get a rugelach recipe from my mother, I wanted to have this book in my collection.
There is not one Jewish cookbook that I return to time and time again. Rather, I decide what I want to make and then research in my collection for numerous recipes that are on topic. I compare/contrast them and from that I develop a recipe that becomes my own version. Doing this, I learned that Jewish honey cake contains coffee and non-Jewish honey cake does not. The honey cake of my childhood was grainy and dry. I developed one that can be made kosher and is moist and tender. Perhaps that is a recipe to share with the Jewish Food Hero community another day.
The Terezin Legacy Nut Braid holds a special significance. Could you share the story behind this recipe and how it came to be a part of your culinary repertoire?
I learned that there was a book that contained recipes that had been smuggled out of Terezin, also known as Theresienstadt. The recipes were written by women who were separated from their families and slowly being starved. I had to have a copy of the book.
When I got In Memory's Kitchen : A Legacy from the Women of Terezin, I read through it completely. The recipes were very incomplete. Originally written in Yiddish, each page contained an English translation with an occasional hint at what the instructions might have meant. I found a recipe for Nuss Zopf -“Nut Braid” in English - that seemed more complete. Thinking that I could make a working recipe from it, I was profoundly moved by the thought that my making this recipe into a functional recipe was a way of making sure this woman would not be forgotten.
It took me a while because the measurements were in decigrams, and I didn’t understand that the yeast was a wet product and thus weighed much more than our dry packets. My scientist husband explained decigrams and the mother of a friend helped me to understand the yeast. As I was working on the recipe, I felt the woman’s presence with me. She was an exceptionally skilled baker. The recipe, which is similar in process to that of making croissant dough, is filled and made into a braid.
When it comes to making the Terezin Legacy Nut Braid, what are some key tips or techniques that you've found to be crucial for success?
You need a cold kitchen! I strongly suggest that you not try to make it if your kitchen is warm and if you do not have a refrigerator in which to put the dough between foldings. Keeping the butter firm, not melting, until it is baking is key to the lovely layers that develop and the lightness of the loaf.
Handle the dough gently! While you knead the dough briefly, you are not making a sandwich loaf. You want layers to develop, so handle the dough gently at all times.
Have plenty of time! Lastly, it can take a whole day to make it from start to finish. It can be refrigerated at a stopping point overnight so that it takes parts of two days. When I won the national King Arthur Flour Baking Across America contest, a baker and a documentarian came to my house to bake with me. They were only able to stay with me for half a day. Thus, after working through the above process, we shifted from using the just made dough, to dough that I had refrigerated the day before to complete the filling, rolling, braiding, and baking. I went through this dual process a second time to give the food editor of our local newspaper the same lesson for her article. I had a lot of Terezin Legacy Nut Braid to bring to my synagogue for breaking the fast after Yom Kippur.
What do you hope people take away from experiencing the Terezin Legacy Nut Braid, both in terms of its flavors and its historical significance?
First things first: the braid is lovely to eat.
I hope that women and men consider baking this loaf. In a small way it helps to remember all those who do not have anyone to remember them or say Kaddish for them. There is room within the filling of the recipe and icing to customize it to something that fits for your family.
I hope that making it could become a tradition that groups of women take on at synagogues or make in their homes. I hope this might become a tradition of bringing people together to make and then to eat this re-creation. I think it fits well at breaking the fast after Yom Kippur.
Terezin Legacy Nut Braid Recipe
Category: Dairy
Total time: about a full day in and out of the kitchen (to allow for the dough to rise)
Yield: Makes 2 very large braids, each of about 20 slices
Ingredients: (in order of use in the recipe)
For the dough:
2 packages or 4 ½ teaspoons active dry yeast
¼ cup warm water
6-7 cups unbleached all-purpose flour, plus more for light dusting
½ cup granulated sugar
1 cups whole milk
2 large eggs
2 teaspoons table or sea salt (not kosher salt)
For the butter pat or inlay:
⅓ cup unbleached all-purpose flour
1 ½ cups (3 sticks) cold unsalted butter
For the filling:
Note: you can add your own personal touch or ingredients to the filling
1 ½ cups finely chopped walnuts, pecans and/or almonds
1 ¼ cups granulated sugar
2 cups raisins
¾ cup finely chopped, or snipped with a scissors, dried (tart) apricots (about 15-20)
2 to 2 ½ Tablespoons ground cinnamon
¼ cup grated bitter-sweet chocolate or to taste {I found it easier to freeze semisweet chocolate chips and then put them into a food processor (mini works well) and then process with about ½ cup of the granulated sugar.}
½ cup (1 stick) butter, melted
For the topping:
2 Tablespoons melted butter, cooled
1 large egg, beaten, at room temperature
Coarse sugar (optional)
For the icing (optional):
2 Tablespoons butter, softened at room temperature, or melted
¼ cup milk, at room temperature
½ teaspoon vanilla extract
2 cups sifted powdered sugar (approximately)
Instructions
Make the dough:
In a large bowl of an electric mixer, stir the yeast into the warm water. Let rest until some bubbling has occurred, at least 5 minutes.
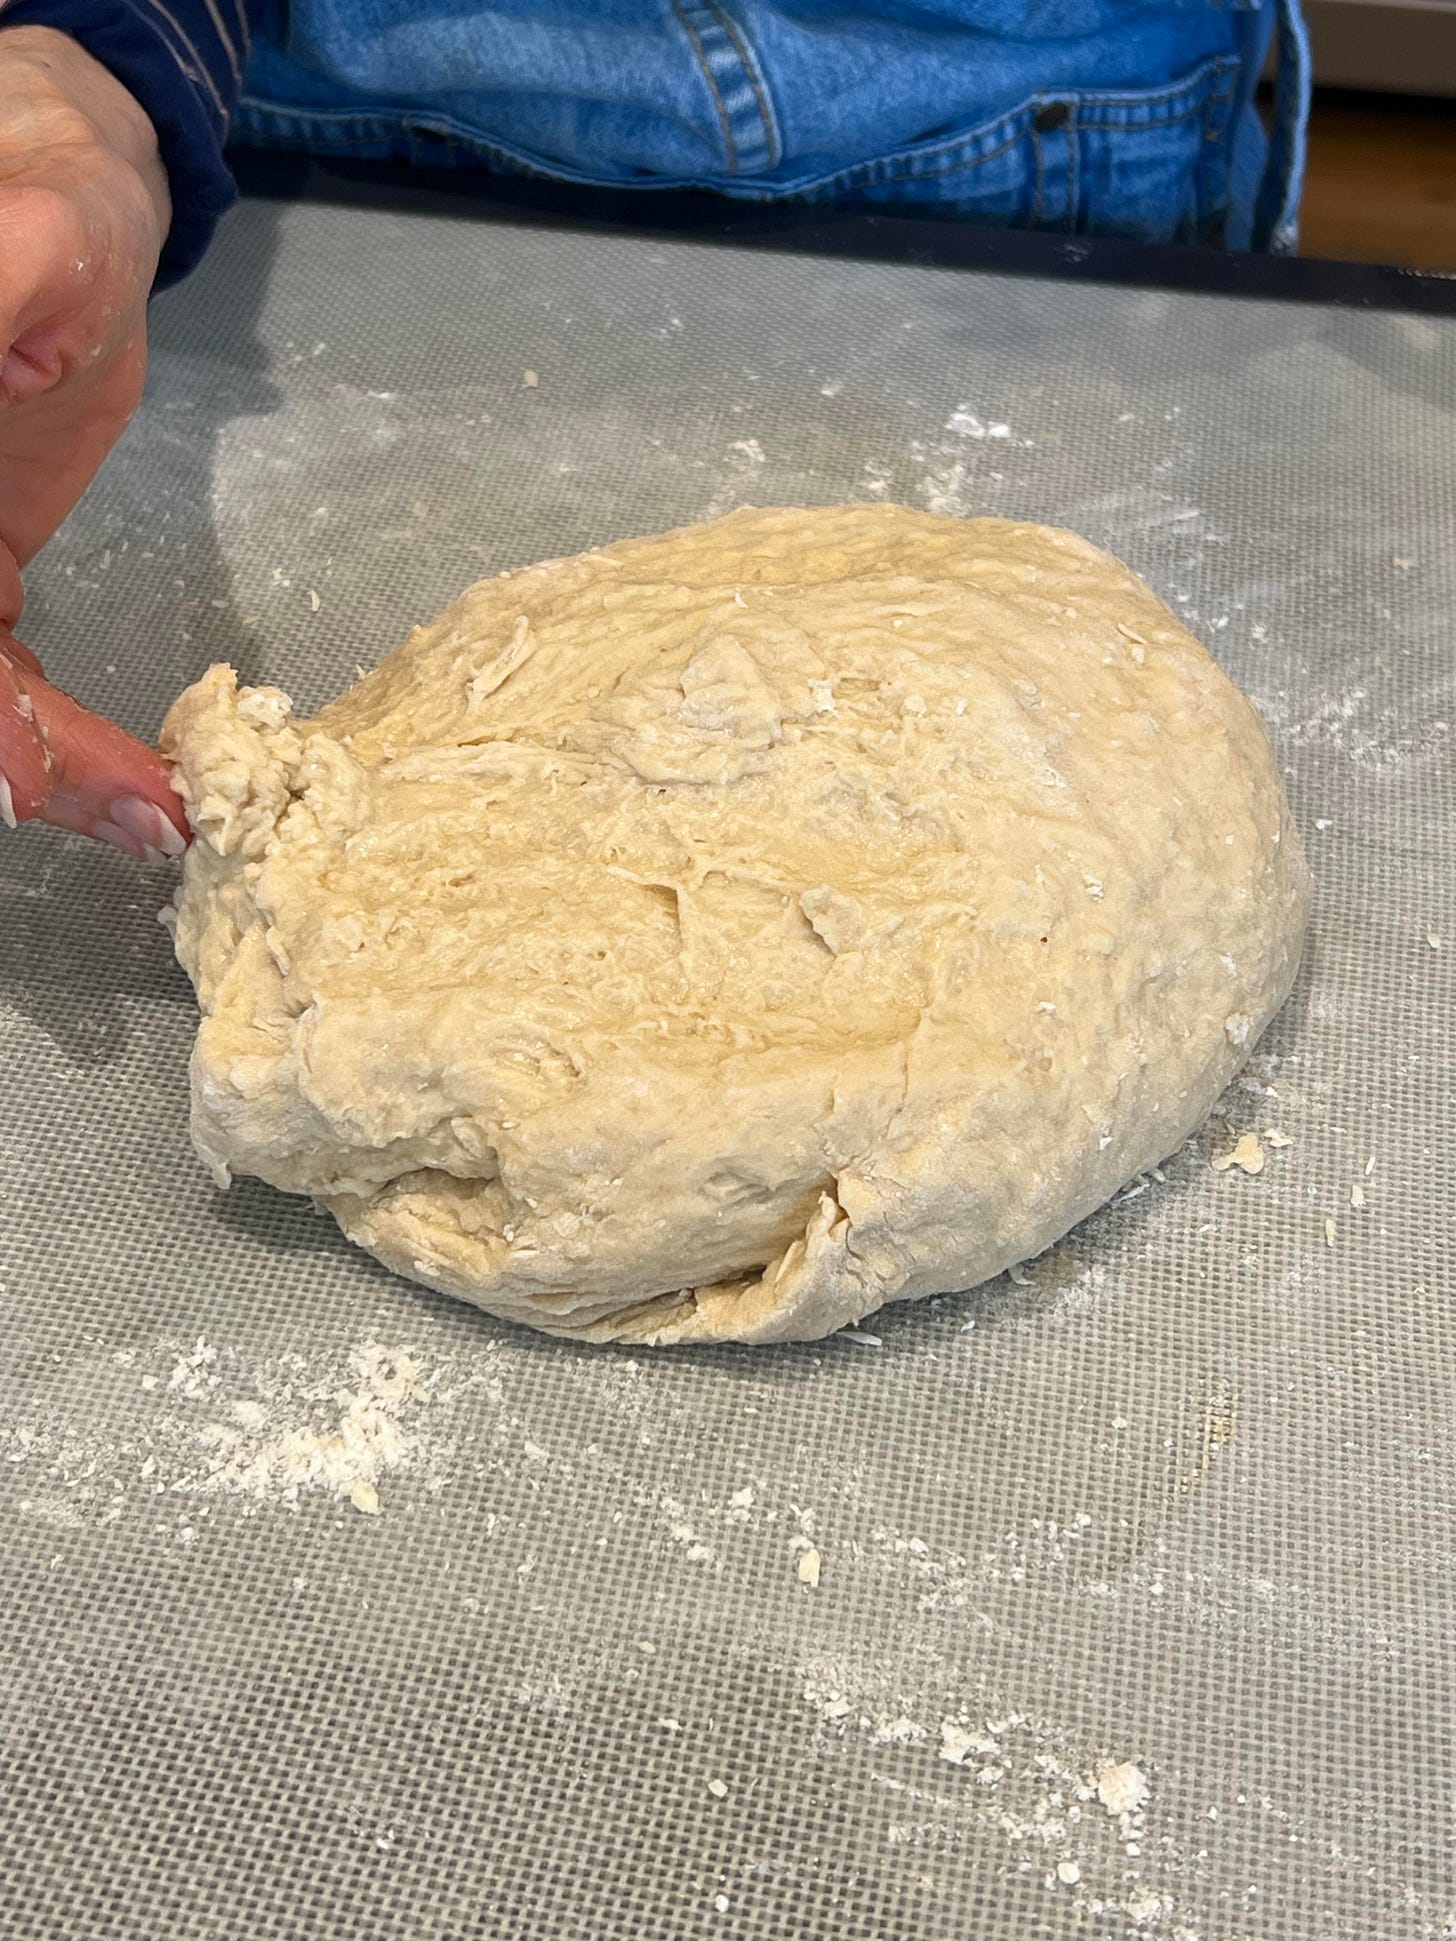
Add 2 cups of the flour, the sugar, milk, eggs and salt and beat with the dough hook of the mixer for 2 minutes. Gradually work in enough additional flour to make a soft, slightly sticky dough.
Remove the dough from the bowl to a flat work surface. Knead until smooth and elastic, 5-8 minutes. (I use a dough scraper in one hand for this part of the process to lift the dough from the work surface because it tends to stick.)
Wrap dough loosely in plastic wrap and chill at least 15 minutes, longer is better.
While the dough rests, make the butter pat:
Using a heavy-duty mixer, food processor, or pastry blender, combine the ⅓ cup flour with the cold butter until smooth. Do not cream it completely or over mix; some lumps are desirable. You do not want to beat air into the mixture.
Flatten butter mixture, using a rolling pin into a roughly 12-by-9 inch rectangle between two sheets of (wax paper, plastic wrap or parchment paper). (I use a ruler for this.)
Chill until firm but not hard, about 30 minutes.
Make the filling:
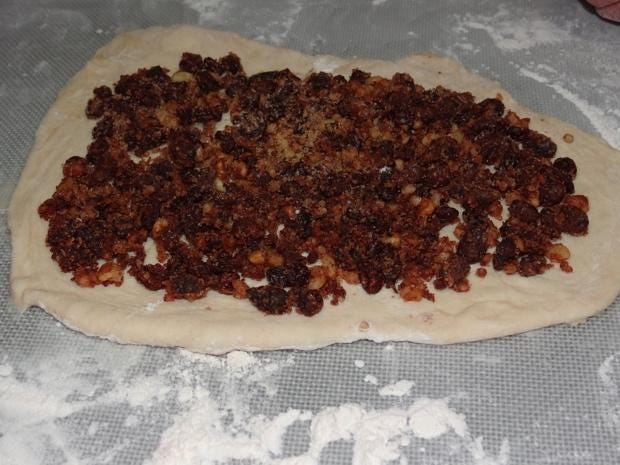
Combine all the filing ingredients and set aside. (You will have about 6 cups.) (I like to divide this into 6 equal portions so that the last one does not come up short.)
Finish the dough:
Roll out the dough: Remove dough from refrigerator. Roll into a large rectangle, about 7 inches wide and as long as necessary to make it about ½ inch thick (about 20-22 inches). (I use a yard stick here.)
Cut butter pat crosswise and place one half on the center one-third of the dough.
Fold one long end down over the butter.
Place remaining butter pat on top of folded dough.
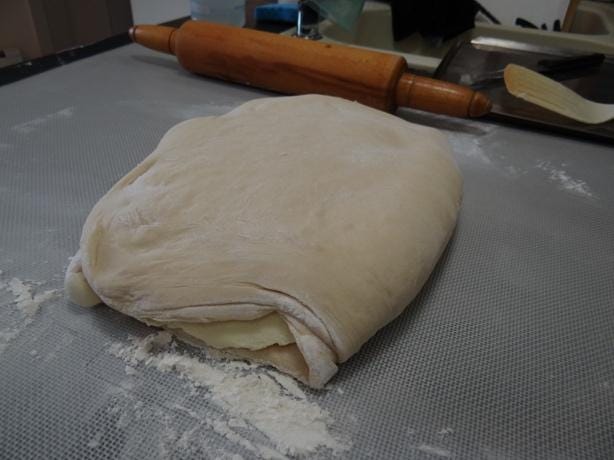
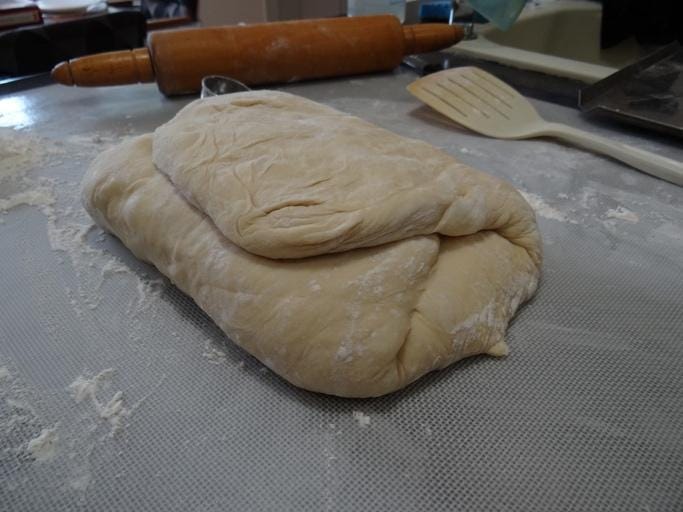
Fold remaining dough flap up over the butter pat (this is the same procedure used to make croissants.)
Gently pinch edges to seal in butter.
Turn dough one-quarter turn so that one sealed edge is facing you.
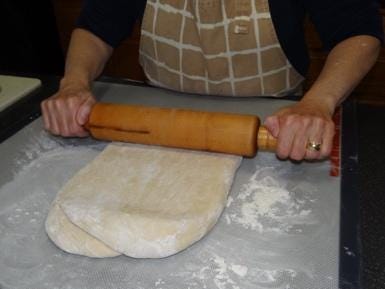
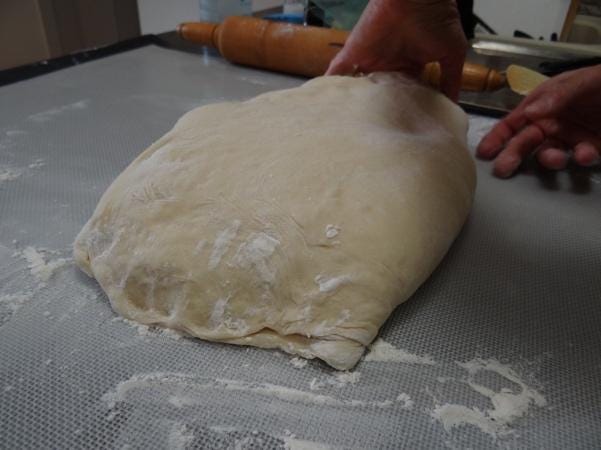
With your rolling pin, gently roll dough into a rectangle about 8 by 24 inches. Fold dough in thirds to form a square. (It will be about 8 by 8 inches.) If dough or butter is too warm, chill dough for a few minutes so that butter does not leak out. (If butter shows through in some spots, pat a little flour over butter and continue procedure.)
Wrap in plastic and chill at least 20 minutes. More time is better, 35-40 minutes is about right.
Repeat this rolling out and folding procedure twice more for a total of three times. Each time, begin with a folded edge facing you so that you roll it in the opposite way from when it was the previous time. It is important to keep dough chilled, so roll it as soon as you remove it from the refrigerator and then return it to the refrigerator as soon as you are done.
At this point, dough can be wrapped and chilled overnight. Otherwise, chill at least 30 to 40 minutes. The longer dough chills, the easier it is to roll it out and fill it.
Assemble the nut braid:
Remove dough from the refrigerator and cut it in half using a toothed edge knife with a gentle sawing motion.
Wrap and refrigerate one half. Cut the other half of the dough into 3 equal parts. Roll out one part into a 10-inch square, pressing on the floured/top side, not the cut side.
Wet the sides and bottom edge lightly with your fingers. Keeping filling about 1 inch away from the edges, sprinkle with one-sixth of the filling (about 1 cup).
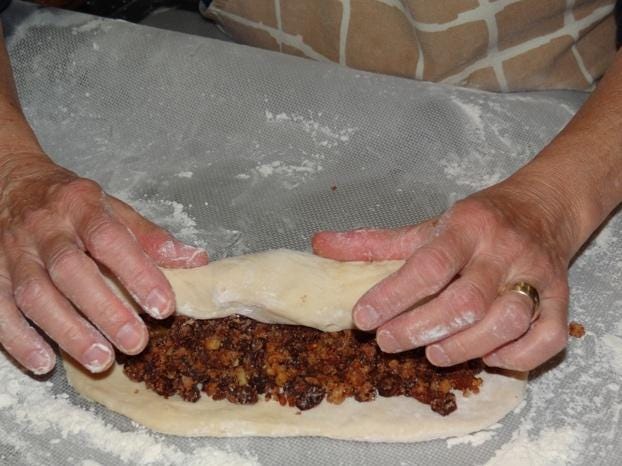
Roll up jellyroll or strudel-style, brushing off any excess flour with a pastry brush as you go.
Gently pinch the side seams together as you roll, then pinch the end seam together; use a little water on the dough if necessary to get a good seal. Place seam side down. Repeat with the other two parts.
Now turn one of the pieces so that one of the round ends is toward you and the other is facing away from you. Roll out the dough piece into a long thin strip, no longer than 16 inches. Pieces of the filling may show through a little. It will be long and flat.
Turn your dough so that the long edge is closest to you. Starting with that edge, roll it up by hand so that it is tubular, instead of flat. Place on a large greased or parchment-lined cookie sheet. It cannot be longer than the diagonal length of your cookie sheet. (Measured inside the lip, my sheets are 16-1/2 inches by 13-1/2 inches.)
Repeat with the other two pieces, keeping them the same length as the first one. (I used a yardstick to measure them.) Place the other two pieces on the cookie sheet parallel to the first and do a simple braid, tucking both ends under.
Dust lightly with flour and cover gently with plastic wrap and let rise 1 to 3 hours at room temperature or until puffed (the time depends on the type of yeast used and the temperature of the room). To test to see if it has risen enough, gently poke your finger into the dough about 1/3 of an inch and if the dimple remains, it has risen enough.
Repeat all these steps with the second half of the dough.
Preheat oven to 375°F.
Brush braids gently with topping mixture of melted butter and beaten egg and, if desired, sprinkle with optional coarse sugar.
Bake loaves in preheated oven 20 to 30 minutes, or until they are a very deep golden brown and baked through. Tent with foil for the last 15 to 20 minutes if the braid is browning too quickly. The loaves may split down the braid lines exposing the filling. Let cool completely on cookie sheets.
If desired, combine the icing ingredients and spread or drizzle optional Icing over the cooled nut braids.
Serve fresh or freeze to enjoy another time.
Tools:
Measuring cups and spoons
6 small bowls
small saucepan
sharp tooth edge knife
separate sharp knife for chopping nuts
wooden cutting board for chopping nuts
scissors
plastic wrap
parchment paper, and/or large pastry rolling mat, or another surface such as a wooden surface on which to roll out the dough
large sturdy mixer such as KitchenAid
small bowl for water
large bowl for flour
separate medium sized bowl for filling
other bowls as needed
pastry brush
cookie sheets
ruler and yardstick.
Share your recipes with our community!
Toby’s Terezin Legacy Nut Braid recipe is impressive! I loved her detailed instructions with step by step photos and the fact this recipe is not one to just quickly throw together, but one to really invest time in and enjoy the process of seeing it come together over a whole day. I would absolutely love to hear from anyone in our community who makes this recipe, please share your photos on social media and tag @jewishfoodhero so that we can collect our efforts to remember the Terezin Legacy Nut Braid’s original creator.
Do you have a recipe with special significance or a personal story attached? Jewish Food Hero is always looking to highlight food with a deep connection to personal Jewish history and culture. Please write to me at hello@jewishfoodhero.com to tell me about your recipe.
Am Yisrael Chai,
Kenden


